Showing posts with label Sewing. Show all posts

Tuesday, November 13, 2012

6 things to know before doing a craft fair...

Hey, so as you may have noticed, I have been slacking majorly on the whole blog thing. I have thought about it every day for almost 2 weeks. I know this does not count for much, but I was taken hostage by the craft fairs. IT TOOK OVER MY LIFE!!!!! I had a great time and made a pretty penny, but I have not done anything else for almost a month! I am so pooped, and ready to be done. I  might have one more this Friday and Saturday  and then I get to start crafting for Christmas!!

The last post I wrote was about the Halloween invites. Halloween was fantastic, and we had a great party. Here is us in our Halloween costumes on our "pumpkin steps" ( Notice the lovely pumpkins that we spent hours painting. THANK YOU to Georgia Brown for all of the help  in this:) I wanted everything to look perfect for the party, and was trying to be a perfect host. Everything did not happen, but we got lots done, and had a great night...
 We dressed up as tigerlilly, peter pan, and tinkerbell.... so fun. I made mine and Nick's costume by repurposing clothes from the thirft store. Total cost less then $10 for both of us.Wanna see more pics? here is the link to my facebook album:

http://www.facebook.com/media/set/?set=a.10151311707244744.541710.727284743&type=1&l=510bf6039c

Ok.... moving on... The craft fairs. The first one took place here in our town. It was my first one ever. I joined in a booth with my friend and her sister. I was super fortunate to get to pair up with such talented people. We did pretty well overall. Georgia made some yummy caramel apples and cute wooden signs. Her sister, Tonie, did the hair bows, which are SSOOO cute. I snagged a few for Khloe. I made the lights and home decor stuff. Our booth was packed...


a chevron tray, bottle,  some yarn "wish poms" and burlap roses I made.


some of the lights I made.

a side view of the booth

a front view
Georgia's wonderful caramel apples were a big hit!!
Georgia with a quick pose:)
my baby looking at my cards:)
Georgia and her sister Tonie


We had a fun two days, and might do it again next year...

The second craft fair was just this last weekend. I got to do it with my sister. We met up and did it in Rigby Idaho. IT WAS AMAZING!! There were so many people there, it was impossible not to feel claustrophobic  and also SO EXCITED all at the same time.  My sister is super talented at typography  and really has a great eye for graphic design. She made all of the wooden vinyl blocks and did the designs herself. She did really well. I made more lights, including some from spoons,  wax paper ( tutorial coming soon:) , and coffee filters.I also painted a ton of frames, and did some of my wooden sign boards. Here is our booth!!

some of her stuff, and some of mine... I made the bird stuff, and canvas', she made all the typography signs


this glitter one is my fav.

our neighbors right next to us... they were so fun.

my sisters stuff... isn't it cute?

my little table of goodies

a outside the booth view

here is our whole booth!! There was so much stuff in the beg.!! I love our little booth sign:)

We got so excited when people actually wanted to come in and look at our stuff. We really love words of affirmation. We both were so excited that we asked our first customers if we could snag pictures with them to post here.
Here is my sister with her first sale!

and here is me with my first sale!

We had so much fun, and this is def. the craft fair to do. I think that the Idaho falls one might be good for next time too, I hear it is HUGE!.

So I am no expert or anything but here are a few tips that I have for anyone interested in joining a craft fair to make it successful!!

1.) start planning early:
I lost a lot of sleep staying up late trying to get everything done the few nights before.  ( I got 6 hours of sleep in 48 hours!! I know crazy...) Start at least a month in advance and make things here and there, to lessen the stress last minute. 
2.) re-arrange/ bring stock:
We noticed that after stuff would sell the booth would start to look a little bare, and well...horrible. We also noticed that a lot of the things at the back of the booth were getting lost, and not noticed. When something sold up front, we moved up something from the back and then replaced the back item with something we had in stock under the table. As soon as we did this the thing we moved up would sell first! It is a nice rotation of stuff, and lets everything get seen.

3.) Plan for trouble:
Moving so much stuff multiple times to get it there really took a toll on the stuff. We arrived with things un-glued, or crunched, even though we were SUPER careful. Bring stuff to fix things. We brought a hot glue gun, scissors, yarn, paint and a brush, glue stick etc. and we needed it. Lots of things came unglued because the cold air froze the glue, and even a vinyl letter got scraped off and my sister was able to fix it and sell it.

4.) Bring business cards:
Everyone who liked our stuff was asking for a business card, and we didn't have one. We ended up hand writing a bunch while sitting at our booth to hand out. So something even just printed out with your contact info would be super helpful. I have gotten a few custom orders this way.

5.) Practice:
Practice setting up your booth before you get there. We did this and it saved so much time in set up. We tried to make our booth look as appealing as possible, and brought in cute shelves and stands, electricity, and a booth sign. So many people commented on how they liked our booth. We did it for cheap too. Pieces of wood for $1 from the Ikea AS- IS  bin became shelves and backdrops. One thing I didn't practice though was doing a debit transaction through the device I got for my i- phone. ( You can find the device HERE.) I got there and had lots of people asking if I took debit and when I tried it didn't work because my phone was not updated correctly.:(

6.) Be optimistic:
Every craft fair is different. At my first one the beg, was slow and I sold everything the last two hours. The second one was opposite. Don't get discouraged if things are not selling right away. Most people who show interest in your stuff still want to see everything in the fair before purchasing, I had a lot of people walk around and come back! It is easy to get down at first, but things will usually pick up at some time.


well that is it! glad I could share. Have any more advice? I would love to hear it! I am opening an Etsy account soon, as I was advised to from some of my customers at the fair. Look for it in my blog soon.  
Happy Craft Fair Season!

-Amanda

Wednesday, October 10, 2012

DIY Baby Peacoat

Happy Fall!! This is my FAVORITE time of year. I get so excited for coats, layers, Hot Chocolate, pumpkin shakes, just everything. We just got our family pictures taken, and they turned out so great. I can't wait to share some more here. For the pictures I wanted my little girl to be wearing a peacoat. It is chilly out, but I wanted something super adorable for her to wear that would be warm. I looked at some online and they were more than I wanted to spend. So I set out to make one. I had an old dress I was getting rid of, and the fabric was just what I was thinking in my head, so I re purposed it. Here is how it turned out:


Wanna make one? I'll show you how below:


So to preface this, I don't think this is a beginners sewing project. I took some pictures along the way, but most of the stuff, you kinda have to know how to do and I will just describe it. There are not too many seams,  but this is not a super easy sewing project. 


 Ok!! Here we go!!

Materials:


  • Fabric for outside of coat ( I used an old dress )
  • Fabric for lining Inside of coat ( my dress had a lining)
  • A piece of clothing that fits your baby to trace for pattern
  • Thread in color choice
  • 8 buttons
  • scissors
  • tissue paper and pen/ pencil ( for making pattern)


Steps:

1.) I Started out with an old dress I was getting rid of. The fabric is nice and warm, and resembles wool. The dress also came with a liner, which was perfect because I just used this for the lining in the coat. I was also able to reuse the buttons off of it for the front of the coat. I had to buy 4 more buttons similar just smaller. They cost me 5 cents each. ( I have a great local fabric shop.) So total cost for me was 20 cents. I know I bought the dress at least 6 years ago. I got it at goodwill. So it is a sunk cost, not gonna count it, but prolly like only 6 dollars to start anyways. :)

I started by un-picking the seams in the back of the dress by the zipper, so that I could lay it out flat and use like a large piece of fabric.


2.) I made a pattern:
there might be a better way but this is how I did it:


I used this little cotton jacket that I had, and liked the design of it. I laid it under my tissue paper, and carefully felt for the seams, and drew on top of the paper where those seams where. I made sure to stretch the jacket free of any wrinkles or lumps to make sure that I got the sizing right.


If you do not have a similar thing that you would like to trace, use other items. A bodice of a shirt and sleeves from a long sleeved shirt would work well too.

You just might have to make it slightly bigger and flared at the bottom to make sure that it will fit. I made the first mistake of not thinking about the fabric types. If what you are tracing is stretchy make sure that you give your non-stretch fabric a little more room so that it will fit around your babe:)

I made sure to label which parts I had traced so that I didn't get confused later. Above is the back of the jacket. There are no seams in it, and it is one big piece.

I added a seam allowance of about "5/8 to all of the sides. ( I started to draw it out all measured, then just ended up eye-balling it.)

I made a pattern for each of these pieces:

Back of coat, front flap ( bottom half), front flap( top half), sleeve, collar, sleeve embellishment ( cuff) , and back of coat embellishment, ( which is the same as the "cuff" piece.)

sleeve, collar, and cuffs. The back embellishment also uses the cuff. Since the coat I was tracing from didn't have these, I just drew a rectangle and added seam allowances.
Also make sure the sleeve has enough shoulder room. The curved part is where the shoulder will be.

Front flaps. As you can see, the first line on the bottom is the length of what I was tracing off of the brown jacket. I wanted it to be longer, so I just added a few inches length and a seam allowance of 1".
 Make sure that the top and bottom pieces put together form a semi- circle for an arm opening.

all of the pieces together

3.) I cut out the pattern pieces and pinned them to my fabric. Then I cut them out. Below is the back of the coat being pinned and cut.


I didn't follow the bottom of the pattern exactly because I decided I wanted to use the hem from the dress, so that I didn't have to sew my own. So I left the bottom un-cut.
I cut the following pieces:

Back of coat (2)- 1 plaid, 1 lining material .(Can be cut on fold as well if pattern is folded in half.)
Front flap bottom (4)- two plaid, one for left side on for right, and then 2 lining , one for each side.
Front flap top(4)- two plaid, one for right and one for left, Two lining, one for each side
Collar (2)-  plaid material one for inside and one for outside
Sleeves ( 8) - four plaid. fronts and backs, 4 linings fronts and backs.
Cuffs (6)- all plaid a front and back for each arm, and then a front and back for back embellishment


4.) I sewed the Front flap top and bottom pieces together facing the right side of the fabric together, leaving the seam inside. I just used a regular stitch, and then zig- zagged along frayed edges. If you have a serger use that... Don't have one....someday....:)


5.) I continued putting the pieces together using a "5/8 seam allowance, piece by piece. I sewed the front flaps on to back piece next. When these were all put together it looked like a vest. You can see where the arm holes are above.

I then sewed the sleeves together. I took two pieces put the right sides of the fabric together, and sewed and  zig zagged. 

Then I sewed the sleeves into the armholes, so that the seams are on the insides. this gets a little tricky. I found it easiest to turn the jacket ( vest) inside out, and then put the sleeve into the hole from the inside leaving the sleeve turned right side out. This puts the seams in a way that will make the seam on the inside.

6.) I continued on with this doing the exact same thing with the lining fabric so that I had two coats. One with plaid, and one with lining. I made sure the finish the hem on bottom of both where needed after sewing the pieces together. I tried to cut most of the bottom pieces on the hem of the dress so that I didn't have to do this though. 

After I had two coats, one plaid and one lining, I turned the lining one inside out. I then stuck it inside the other coat. I did this so that the lining seams would be facing the inside. This way no  raw seams are visible.

7.)To sew the lining into the sleeves, just flip the sleeve inside out, and stitch around wrist. Including both the plaid and lining. Then flip right side out.

Here is what mine looked like with all of the pieces sewn together and the sleeves attached to the lining:


above shows the inside or wrong side of the jacket, and the lining. it is still loose and is only attached at inside of sleeves.

8.) I then sewed the collar. I put the right sides of the fabric together, and sewed along 3 sides. I left the bottom side open because it would be in the neck seam anyways. I then flipped it right side out, and top stitched around the edges for decoration.

 I did the same thing for the arm cuffs, and the back decoration. I sewed the fabric right sides together, and left one side un- stitched. I then flipped them right side out. At this point they look like pillow cases. I tucked in the seams, and then top stitched around the edges of all 4 sides.


In retrospect I should have included the cuff into the sleeve seams when I was sewing the sleeve. Well I didn't So I had to turn it inside out, and un- stitched a place for the cuff. I placed the entire little rectangle inside the turned out sleeve and stitched over the end. When I turned the sleeve right side out it was now in the seam. Just one side though. It should be like a flap. I attached the other side with the button.

9.) Putting in the collar. I flipped the jacket up side down to that I was looking inside the lining, and wrong side of the jacket. I flipped it so that these to raw seams were facing each other right sides of the fabric together. I then pinned along the neck seam right sides together. I added the collar into the seam. I put the raw edge that I had not sewn into the neck seam. I then sewed across the entire neck seam catching the collar inside it. I made sure to leave my needle in and pivot at the end of the top neck seam where it would be the "flap part" on the front of the jacket, and square it off. Then flip it right side out, and your collar will be in the seam, and the top edge of the coat is no longer raw.

10.) Finishing touches:
Lastly is the finishing touches.  I folded over the flaps in front towards the inside lining about 3/4" as a seam allowance. I stitched it in place along in the inside of the seam. I top stitched in a rectangle on the outside of the jacket. This creates a little place of the button holes later.

I left the lining open at the bottom of the jacket. It is only attached at the sleeves, and neck seams.

I hand sewed on buttons onto the cuffs, making sure to not go through the lining on the inside of the coat. I used the button to hold down the cuff flap opposite of where it is insert in the seam:


I did the same thing with the back of the jacket adding on the embellishment. The buttons are holding it on on either side. I again made sure not to catching the lining in this.


Then I used my button hole foot, and sewed two button holes on top of the flap/ hem I created on the front of the left jacket front. Then I sewed on two buttons for going through the holes, and two faux buttons for looks.


All Done!!!!!


It was an ambitious project but it only took me a day, once I got the pattern made. Hope you have a happy day!!

-Amanda 

Friday, August 10, 2012

DIY Lace Baby Romper

Well we have officially hit some setbacks, and we are not moving for another few weeks. So now that we are pretty  much all packed up and waiting I am going a little crazy. To alleviate the boredom and not think about how much I just want to be in house already, I did a few crafts this week (sitting among tons of boxes on the floor:)  I made this little romper for just the cost of the lace.


So every month I try to take a photo shoot of my little girl. I am trying to practice my photography, and she is the perfect little model. This summer I have seen baby rompers everywhere, some with lace, that are so cute. I wanted one, for her 7 month photo shoot, so I made one. The lace only cost me 7 dollars, ( a dollar a yard) and I already had everything else. So this is almost a no sew project...almost. I wanted it to be more like a costume than an outfit for her, so I just hot glued it. If you want it to be more durable than sewing would be the answer :) I was just going for fast and easy. DIY below!!


Materials:

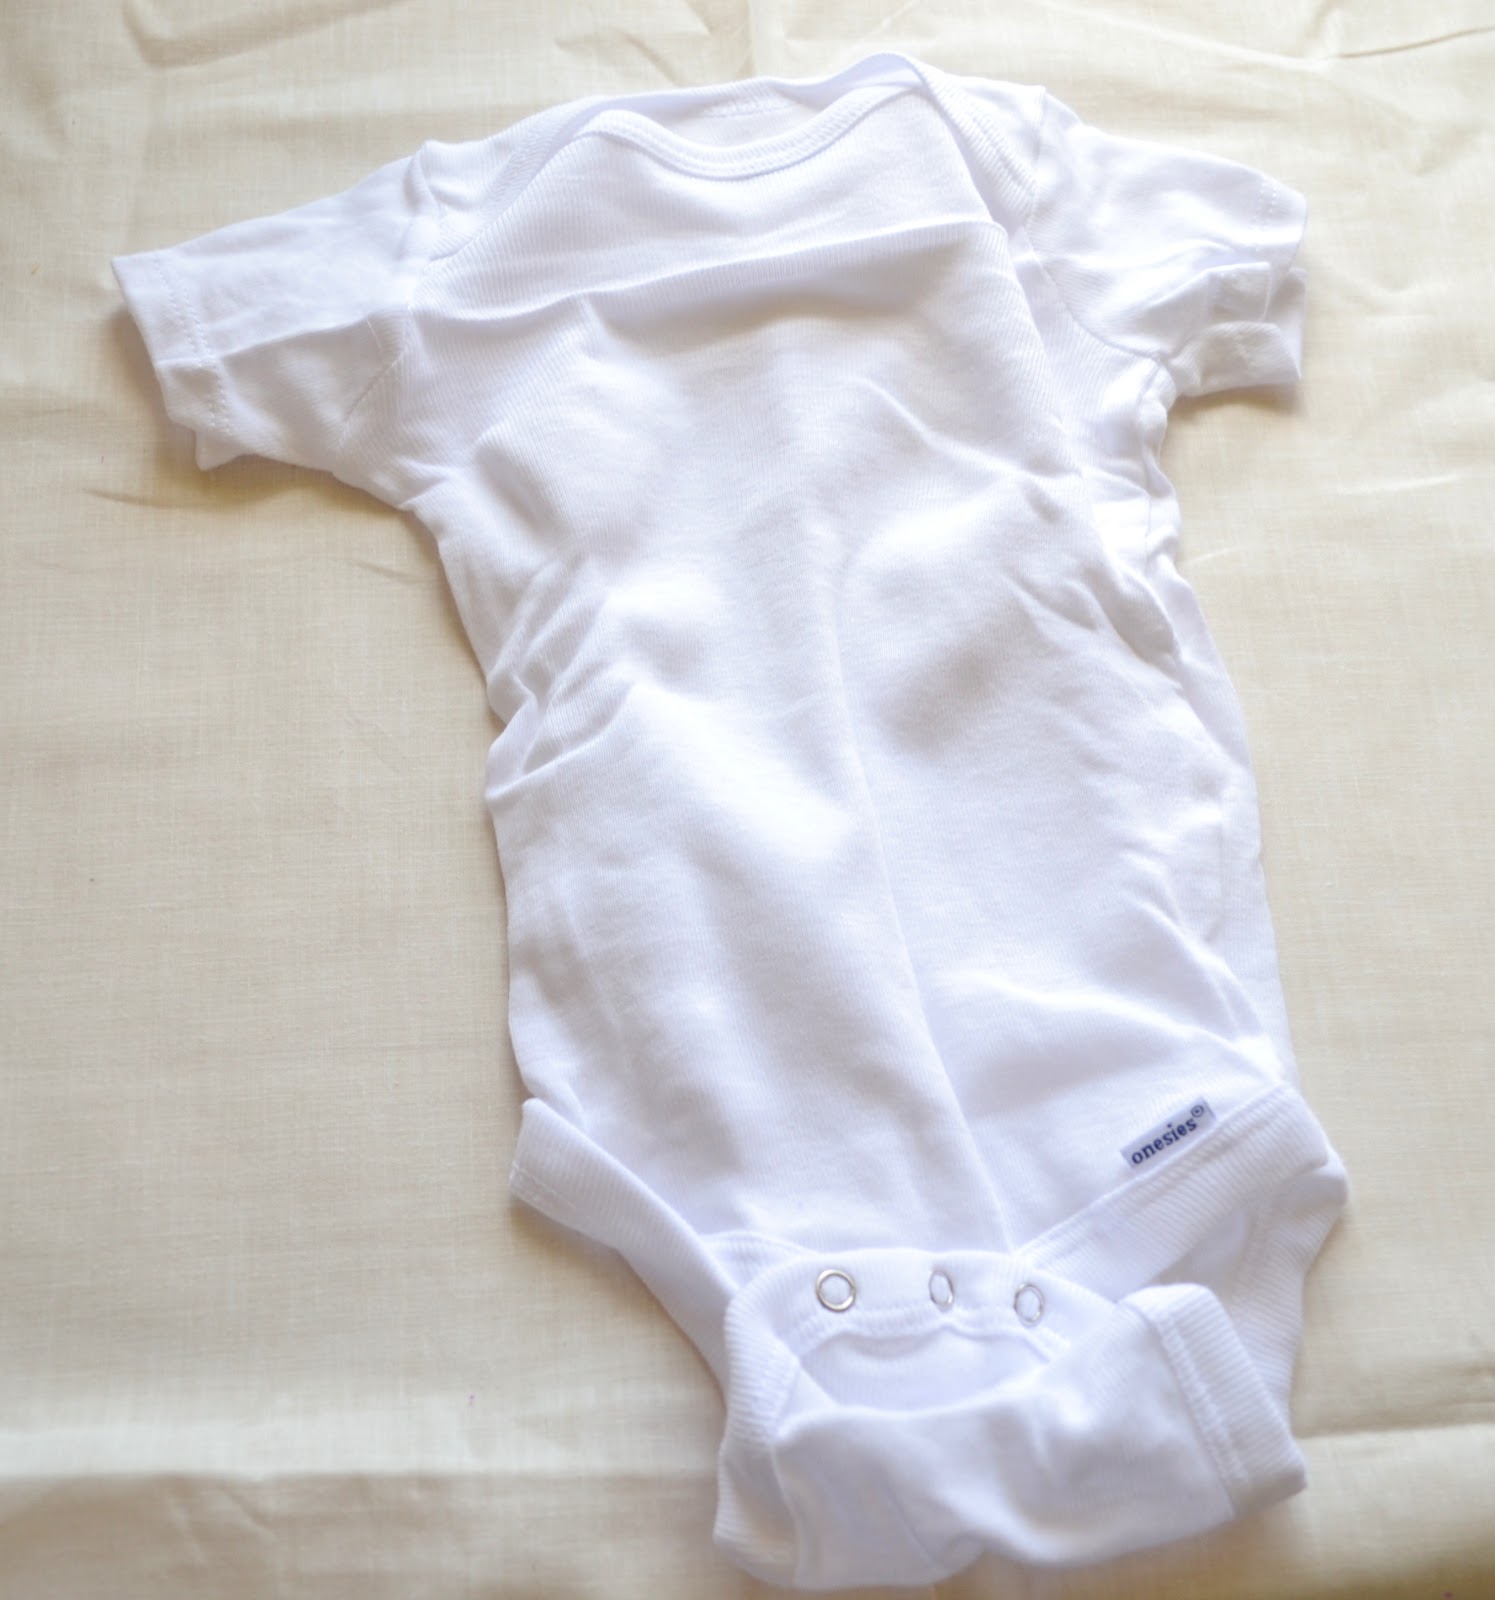
  • A onsie
`
  • lace- about 7 yards... mine already had a facing around the edges, which was really nice for gluing. If you are going to sew it though, you might want something else, maybe with elastic, as mine did not stretch.


  • ribbon for facing

  • 2 buttons
  • hot glue / glue gun
  • needle and thread to match lace color


Steps:

1. Start with a plain onsie. Any color will do, I just had a white one on hand.


2.) cut off the top, cutting the sleeve in half. I ended up going halfway in the sleeve just so it wasn't too short later...


3.) Cut off the sleeves, going in a diagonal going in towards the center on the onsie. This is going to be the new armpit holes after you add straps later.

4.) wrap it around something that is about the same size around as your baby. YOU HAVE TO DO THIS. I know that it is much easier to just lay flat to glue, but gluing on the lace prevents it from stretching after, and it will not fit your baby. I used this oatmeal can because it had about the same measurements as my babe...;) I added a piece of thicker sweater material and rubber banded it on to get it even closer to her circumference... Glad I did, because after I was done with the romper it was kinda hard to get on after... it wouldn't have fit if it was any smaller...


side view of it on the oatmeal can... kinda lumpy but oh well...
5.) start in the back of the onsie, and glue it on in circles, cutting again when you end where you started each piece. Do this all the way up the onsie. Leave the flap alone at the bottom of the onsie unless you want ruffles in between the legs haha... I just started gluing at the same height as the sides above the flap. I left about 1/2 an inch in between each layer of lace, because it would hang down and cover the void.


6.) I did it all the way to the top until I couldn't go in circles anymore ( armpit level), and then I just cut shorter pieces and glued them individually up the front and back where it comes up higher than the armpit area.


all done with the lace... kinda stiff, it stands by itself;) this is a side view
7.) Now for the edges. I used a sheer ribbon that I had on hand to just wrap over the edges on front and back and under the armpits to cover up the raw seams from the onsie. This ribbon worked great because it already had a finished edge on the top and bottom ( like all ribbon does;), so I was able to just sew it on. You can use a machine for this, or hot glue. My machine didn't like it because the needle kept going into the dried hot glue and getting stuck. So here is a picture of me trying but I ended up just doing it by hand and a little hot glue in places...


8.)Here is what the finished edge looks like on back and
I  forgot to take pictures of these next steps so sorry for repeat pics.
I sewed on two buttons one on each side... over the facing.


9.) I took the last two small pieces of lace that I had to make the shoulder straps. I hand sewed them onto the front of the romper over the facing, and then added a loop to each end to go around the buttons on the back. I did it this way instead of sewing them right to the back for ease of getting it on her. Since it was not stretchy, it was a little tight for the arm holes, so this way I could button it once it was on.


ALL DONE!! I was super duper easy and I did it in about and hour and a half.. It turned out a little big, but I kinda liked how it fell off her shoulder like she was wearing dress up clothes or somethin'.

We added some pearls, a feather headband, props,  and took some fun 7 month pictures! 


Wanna make that feather headband? I am doing a DIY on all kinds of headbands for you and baby next week! Check it out. If you make a romper post some pictures I would love to see them.

Have a lazy weekend, I know I will. (Well except for the town celebration and street dance this Saturday. You know I am gonna get my groove on, haha. Gotta love small towns.
peace!- Amanda


Link up parties:


I Heart Nap Time

Making

this post was featured here: