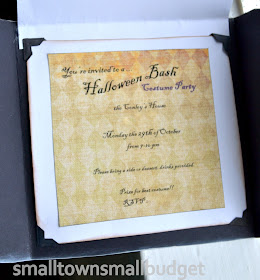
I just love em'. They are everywhere. I have been wanting to do this project for awhile now. I have said it before but I will say it again. I LOVE HALLOWEEN. So much. I wanted some spooky invites for a Halloween bash, and this is what I came up with:
OK HERE IS MY INSPIRATION....
When we were in Oregon in september we went to the outlet stores at the beach. There we went to the Harry and David store. First time for me, and I was super impressed with all of the yumminess there. I thought it was a little spendy, but so yummy. While I was there I saw this owl cookie box.
I thought that it was pretty cute, and wanted to do a spin off of my own for a party invite.
Wanna make your own? DIY below>>>
Materials:
- Scrapbook paper:
-Base color card stock ( black in picture)
-textured / design ( brown striped in picture_
-white card stock
- brown/ black ink stamp pad
- scissors
- tape ( for making pattern)
- eyelets/ tools for putting them in
- gluesticks/ hotglue
- hemp/ string for closure
optional:
- embossing powder
- embossing gun
- stencil for bigger pattern
- acrylic paint ( cream in picture)
- paint brush for stenciling
1.)pattern
So I started out by making my pattern. The pattern consists of a square center measuring 5 1/2 inches by 5 1/2 inches. The outside circle flaps were done by laying a bowl on top of the black card stock and tracing the circumference. Then I cut it in half and placed half on each side of the square. I made sure that the diameter of the bowl was the same as the height of the square...5 1/2 ".
Then I taped the flaps to the square so that it was one big piece... ya i used black duct tape. Any tape will work.
2.) tracing
Trace your pattern onto a piece of cardstock. I used plain black because I wanted to stencil on my own pattern. If you have a piece of scrapbook paper that you would rather use than that is great. Skip to step 4. If you wanna stencil just keep reading. After you trace your pattern cut it out with your scissors. the tick marks below show were the flaps will eventually fold in.
3.) stenciling
I bought a pack of these stencils at Walmart for $3.87. It came with TONS. I chose a pattern that I liked and punched out the little pieces and used a blunt ended paint brush with super stiff bristles. I know that they make stenciling brushes, this is just what I had on hand. I laid the stencil over the black paper, dipped my brush in paint, and dabbed till the voids were covered. I then moved the stencil and did it again. I did this all over the paper. When I was done I took a little extra paint and dry brushed the edges.
 |
| this is a picture after the card is done, but it shows the dry brushing along the edges of the card. |
Next I cut square pieces for the inside of the card. I cut a piece of white cardstock measuring
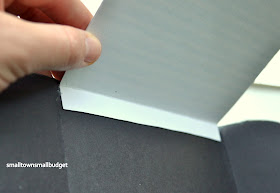
5 1/4" X 5 1/2" So that it would fit inside of the outside enclosure. I left a small lip on the white paper measuring about 1/4" hence the measurements not being a perfect square... I folded this over and used it to glue it to the black stenciled cardstock. On top of the white I cut and glued a textured piece of paper to the outside of it. It measured 5 1/4" X 5 1/4". This one is a perfect square.
 |
| white cardstock with folded lip of 1/4". whole thing is 5 1/2" tall, and 5 1/4" wide. this picture shows it sideways... |
 |
| textured top piece measuring 5 1/4" X 5 1/4" perfect square. |
 |
| here is the white flap hot glued to the black cardstock. This is the inside of the card. |
tie them closed and deliver. I thought that these would be fun for just about anytime of the year too since they are not too halloween theme colored. I love them, and can't wait to make more for birthdays etc.
 |
| I kinda wanna just display them on my mantle...:) |
That is it! It did take a little time, but I had all the supplies on hand so it was no extra cost.
If you make something similar let me know I would love to see!
-Amanda


Okay wow. That had to take forever! It has been decided that you need to make lots more for the craft fair. You can stick them in my card basket and I think people will love them.
ReplyDeleteDone and Done all decided.
Super Cute!! Both you and Heather amaze me with your ideas and execution of the projects. Keep them coming!!
ReplyDeleteGreat post thaanks
ReplyDelete